Friday, October 26, 2007

savoring...


these are some trees that are growing right next to one of the many vineyards in Walla Walla.
the smell of the grapes against the smell of the poplars was unbelievable.
it just made you want to brew something up with all of the scents around you and drink it up.

the fall is for savoring all that is around you. you must do it quickly and effectively because it won't last. soon it will fade away and then winter will be here. encasing everything with a heavy frost, preserving it until spring.

I hope everyone gets a chance to get out this weekend and savor something with someone you love.

Tuesday, October 23, 2007

poster framing...


I recently went through some of the older photos of Zoe when she was much, much smaller.
Those were the days of the sad little 3 mega pixel camera that I had to get by with.

I had no idea at the time what I was missing out on. But now that I have the Nikon D40 in my possession, I have seen the light flash!

Looking at this old collection of memories that are so dear to my heart, I was saddened by their terrible shape. Alot of noise. poor lighting and extremely grainy.

So I just went with it!


for this photo, I first converted it to black and white to mask play off the graininess in the picture.
I played with the exposure to make it a bit darker, adjusted lights and shadows and
lasso'd the outer edge with a soft black shading, to give it a vignette look.

wrapped a thin white canvas then a large black canvas and typed text in white over the black field.
the steps on this one are much like the ones for the Capturing a Moment post.

Monday, October 22, 2007

Congratulations, Sarah!

I used a random number generator to select a winner for the print giveaway and the random force of the internet chose Sarah!

Congrats, Sarah. Email me at (my first name)@yahoo.com to let me know which print you would like. I will have it professionally poster printed and sent on it's merry way to you.

Thank you, to everyone who entered! These little giveaways are such fun! In fact, I will be having another one as soon as I launch my etsy store. So keep checking back!
(I think you'll find the prize to be a real hoot!) ;)

Friday, October 19, 2007

capturing a moment...

Finding a great shot within a not-so-great shot is simpler than you think.
Just keep your eye on the subject or the moment. Whatever happens to be getting in the way of the shot can easily be remedied.

Take this shot for example.


First of all, we have to crop out the half of a half-naked mommy on the right side of the photo. The daddy apparently thought it would be funny to capture mommy in this vulnerable state while pretending to just take a picture of the babies.
we also have all the crap in the background that is quite frankly not ascetically pleasing.

so let's start by cropping the photo.


But due to the angle of the shot, we have to crop it at an angle.


Now, the colors here are neutral and looking a bit blah.


So let's convert it to black and white.


At this point, I put a Sepia photo filter on it. Some shots just look better with a warmer filter.


then I adjusted the exposure a bit, just to give it some final tweaks.


Now, as great as this shot looks, I wanted to frame it in black so it needed a bit of shading around the edges just to add a little depth.
For this, I used the Marque tool to draw just inside the outer edges of the photo.


Now refine your edges. I went with very low contrast to avoid harsh lines and Expanded 35+.
I also turned the featheredness and smoothness up high for a soft-focus look.


You then, Select-Inverse and Edit-Fill with black.


Finally, deselect.


Now for the poster frame.


I created a narrow white canvas first. (20 pixels)


Then I created a larger black canvas. (200 pixels)


I thought this shot would be great with some text so I selected the text tool, chose white and centered it in the black field.


Comparing the two shots, you can see that this whole process is totally worth it in the end.
What looked to be a wasted shot, turned out to be a golden opportunity to capture the sweet moment of my babies sleeping.

A big "thank you" to my hubbie for taking the original picture!

Tuesday, October 16, 2007

my Nikon jar...

I caught a documentary this weekend that really moved me.
It was about a man whom I had never even knew about.
Call me naive, but I had previously never heard of George Eastman.
The founder and creator of "Kodak".

The hobby that I have been fully immersed in for almost my entire life was made possible by this man.

No, he didn't invent Photography, itself. But he made it possible for every person today to be able to own a camera of their very own.
He took a process that had so many faults and simplified it. He brought the camera to the masses and made it affordable for everyone.

I also learned something I didn't know about the Brownie camera. It was created to draw in children. The angle was that it was so easy to operate that even a child could use it.
The Brownies were, at the time, a cartoon character popular with children of the day. So by using them in their advertising, they were ensuring that every single child in America would demand a Kodak Brownie.
The Brownie cost 25 cents to manufacture and they sold it to the public for just a dollar!

Eastman also pioneered the use of 35 millimeter film. And who can argue, that was a huge step for Hollywood's movie making industry!

It amazes me to think that we can instantly freeze a moment in our lives and keep it safely locked away to later come back to and reflect upon it.
It makes time travel possible and sweeps over us with a feeling of Nostalgia.

How many times have you forgotten a fine detail of your past and after looking at a photo, you suddenly remember something.
Something that previously escaped you and once given visual evidence of it, your heart and your mind are unitedly uplifted.
A memory! One you didn't even realize you had until that moment.

Photographs are capable of so many important things. They chronicle pivotal moments in human history.


Capturing moments like lightning bugs in a jar. A photographer is able to bottle up time in their capsule and later release it to share with the world.

I'm just so thrilled to have a small part in capturing memories in my very own little jar.

Tuesday, October 9, 2007

generations...


I recently took my husband's grandmother, aunte, cousin and second cousin out to take their pictures.

Four generations of women.
Four beautiful women.


As I peered through the lens at each one of these woman, I thought of all the journeys each woman had been on, where they rooted from to where their life has led them.
It was amazing to think that three of these women were created by one.


These women shared a bond like only a woman can. Seeing your daughter grow up and carry on the legacy of your family is a precious thing to behold.
It made me long for the day when I can have my picture taken with my mother, my daughter and her daughter.

As scary a thought as that is, I see proof right in front of me of what a blessing it can truly be.

Monday, October 8, 2007

Photoshop greatness...

here is a prime example of why I love Photoshop!
I mean, my camera is like an extension of myself and truly never leaves my side but when it comes to taking your photos to the next level, Photoshop is a dream come true!

from adjusting the contrast and color to the shadows and brightness. something as simple as cropping the photo to morphing an object completely out of the picture. Photoshop takes a possible miss and turns it into a hit.


case in point:


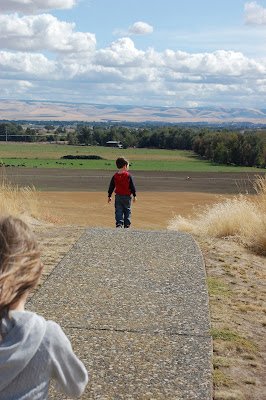
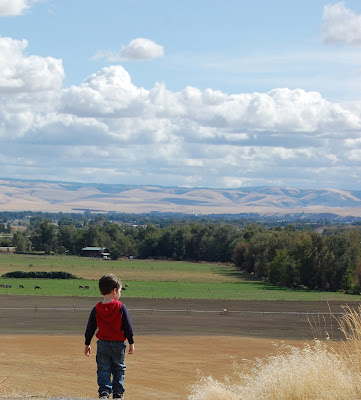
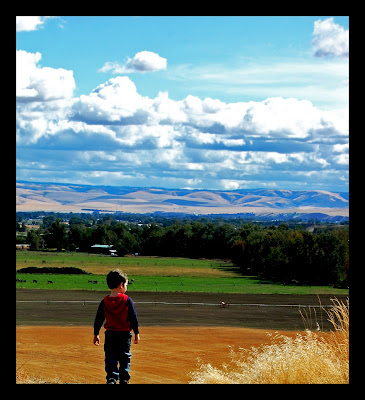
I loved the view in this shot and just as I snapped, my daughter walked into the frame.
no problem, crop her out.


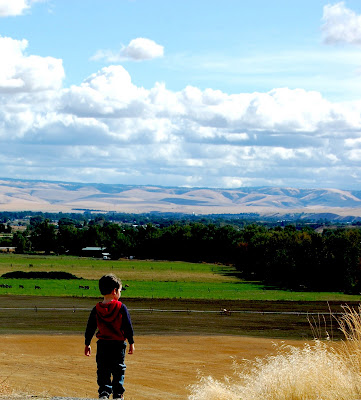
but the color in the photo doesn't even come close to the vibrant hues that were surrounding him on that hilltop.
so, let's adjust the levels and the exposure.


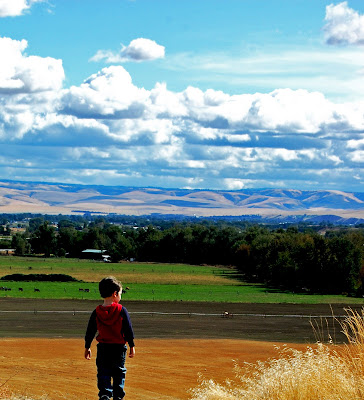
now, let's make those clouds really pop by adding a cyan filter.


and to give the entire photo a more unified look, we'll add a frame.


this is only the very basic stuff with Photoshop. there is so much more you can do, it's insane. you're basically only limited by your imagination.
and I find that mine is always soaring high.

Friday, October 5, 2007

basic border tutorial...

I've been asked more than once "how do you put the border around your photos?" So I thought I would post a quick tutorial. I use Photoshop CS3, so I don't know how well this translates to earlier versions. nonetheless, here we go.

first, open any photo you want a frame around (this works best on flattened images but if you need several layers just be sure the background layer is active when you apply the script), and make sure your action pallet is showing (shift-f9 if it isn't) ...


then, click on the "create new action" button...


in the dialog box that pops up give your action a name...


choose the set you want it in and if you want to give it a shortcut, now is the time to choose that...


now Photoshop is "recording" every click you make (every breath you take, it'll be watching you.)
oh. sorry! that was the geek husband influence kicking in.)
click on (the menu bar) image, then canvas size (or alt+ctrl C) and in the dialog box set the size of the border, I use 50 pixels that way I can run the script more than once if I want a wider border...


most importantly make sure the "Relative" box is checked and the anchor is in the middle...


and the last option, "canvas extension color" will determine the color of your border. I use black most of the time. this gives you a basic border...


click OK.

then go back to the actions pallet and click on stop...

now that you have your action recorded, you can replay it on just about any image you like by either using the shortcut key you assigned it or by clicking on it, then clicking "play".

you can also mix this up a bit if you like. while recording you can increase canvas size more than once using different colors and/or sizes.
I must give the credit for this tutorial to my geek of a husband, Jason.
(he told me to type that, I swear!)

peafowl and chick...


I love how this one turned out!
the original wasn't bad but I used an aged photo technique in Photo Shop
that gave it so much more depth and character.
it made the birds in the forefront pop out, while the background remains muted.

I shot these birds at the Pioneer Park Aviary in Walla Walla.
they have about 20 exotic birds, consisting of 50 different varieties.


Thursday, October 4, 2007

heavenly heron...


you'll find Great Blue Herons all up and down the Mill Creek. where ever you see water, you see them.
they also have a nesting ground that fills a large cluster of trees right outside Whitman Mission.

this heron was beautifully backlit by the high noon sun lighting the clouds. it makes for a vibrant background to his dark form.

Wednesday, October 3, 2007

Mill Creek, Ortonized...

Mill Creek in Walla Walla is a beautiful place to soak up the local urban wildlife, while enjoying the cool breeze through the many trees surrounding it and the lovely scenery.
Mill Creek is one of the major tributaries that runs into the Walla Walla River.

the Orton effect was applied to the original photo to give it more of a vibrant glow.
it's an effect that works great with pictures that have alot of gold color.

learn more about the "Orton Effect" here.

Tuesday, October 2, 2007

I ssssssssee you...


this snake was hanging out on the walking path at the creek where the kids and I walk.
I used my telephoto lens and got as close as I could.
he didn't even budge.
apparently, he is a popular snake among the society of reptiles and is quite used to having his picture taken.

a gallery...

it is my intention for this to become a place for you to go to discover the world as seen through my eyes.
I love taking pictures and this my way of sharing my love with you.

please enjoy looking and I would love to hear from you through either comments or email!